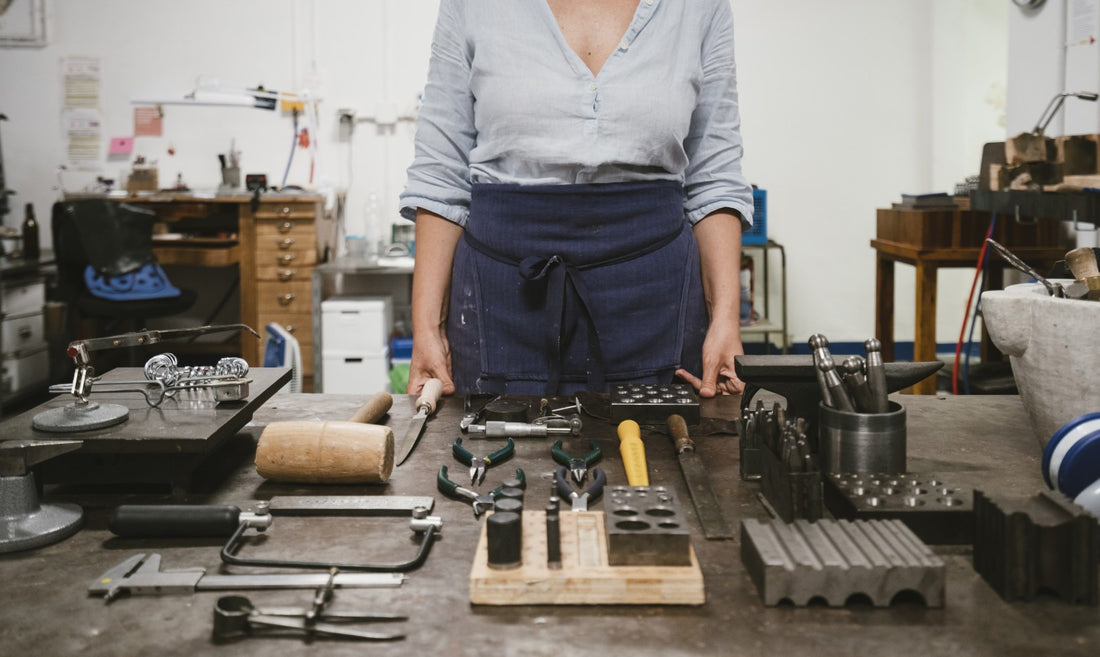
12 Tools Every Jewelry Maker Needs
Electricians and jewelry makers have at least one thing in common: They love them some flat nose pliers.
If you want to make necklaces, earrings, bracelets, rings and more, you too will need a pair of flat nose pliers, plus a few other wire-wrapping tools. But before you drop a ton of money on a lot of equipment, you gotta know the basics. Here are my essentials.
1. Flat Nose Pliers
These will be your go-to. They'll help you open jump rings, finish wire-wrapped ends and complete a multitude of other tasks you've yet to imagine. You may want to consider two pairs so you can grasp anything without leaving a crimp in the metal. Be sure to look for pliers that have a smooth surface between the jaws.

2. Round Nose Pliers
These will help you make wire loops and hoops, bends, clasps and jump rings. You'll reach for them whenever you want to make a nice smooth curve.
3. Nylon Tipped Pliers
Learning how to bend wire takes some practice and you will inevitably get some kinks in your material. You can curse the gods...or you can reach for a pair of nylon tipped pliers. Simply grab one end of the wire, grip tightly with your pliers and pull your wire through to smooth it out.

4. Wire Cutters
You want these, and you want them to be good quality. There are a lot of cheap ones out there and they can wear out pretty quickly, especially when trying to cut thicker wire. Swanstrom and Lindstrom both make great pairs that you'll have for years. Do future you a favor and make the investment.
Pro Tip
If you're cutting thin wire and don't have any wire cutters, toenail clippers can be a great substitute. Trust me — it's the best $3 you will ever spend in your jewelry-making life. Along with being cheap and easily accessible, they can get in very close to your work so you don't have rough stray ends.
5. Flush Cutter
Cutting lots of wire for all those new wire-wrapping techniques you're learning? Consider a flush cutter. You will use them the way that you would good regular wire cutters, but they magically never leave loose ends! But pay attention to the size of wire you're cutting — flush cutters can only handle a specified guage (and you don't want to ruin your pair by cutting something too thick. I'm speaking from experience).

6. Practice Material
You really don't want to get spendy on silver or gold fill wire until you figure out what you're doing. Copper wire or other base metal wire will help you get a feel for things without wasting your money on valuable metals.
7. Ruler
The most basic piece of jewelry equipment would be a standard ruler, and likely it's something you already have. I prefer a graphing ruler because being able to see through it helps me visualize a little better.
8. Disk Punch
Do you want to cut circles, squares or even hearts, evenly and repeatedly? Look no further than a disk punch, a tool that will consistently produce identical shapes.
To use a disk punch, you simply sandwich a sheet of metal in between the two layers, insert the proper circle and hammer out a disk. I've found that a brass hammer works best due to the fact that it's heavy enough to give you lots of extra power, yet soft enough that it will land a strong blow without a lot of bounce back. Again, price = ability to produce the same results and save you time.
9. Jeweler's Saw
If your designs are relatively small and require lots of little, intricate cuts, turn to a jeweler's saw. They give you the freedom to detail the work of a piece, and blades come in sizes that range in uses — from thin blades that barely part the metal to strong, thick blades that remove more metal.
Pro Tip</h4>When using a jeweler's saw, use a lubricant to help keep your fingers safe from catches, reduce the chance of breaking a blade, and preserve the cutting edge. Just run your blade through a little before cutting and I promise an all-around smoother experience. Bur-Life is the lubricant you'll find on my bench.
There are blade frames that are a standard size and ones with a deeper throat depth. The deeper one will allow you to make long cuts if you're working with a long piece of metal or a larger piece. My small jeweler's saw gets a lot more use than my rusty, old one. That's because a smaller frame is easier to control, which is something to keep in mind if you decide to invest in one.
10. Wire
Wire comes in all different materials—sterling silver, gold-filled, rose gold, aluminum, copper to name a few—as well as sizes, or “gauges”. While it may sound counterintuitive, the higher the gauge number, the thinner the wire. Here are the three sizes you need in your jewelry toolkit.
24-gauge wire
This gauge will serve you well for projects that need a little extra strength or for beads that might have larger holes.
26-gauge wire
This wire will fit through most beads. It's thin enough to make wire-wrapping easy peasy, but has enough heft to be secure. Just be careful not to crimp or bend it multiple times—it’s not that sturdy.
28- or 30-gauge wire
If you’ll be working with small precious stone beads, known for their teeny-tiny holes, you’ll need some extra-thin wire on hand. Just keep in mind that this wire isn’t the best choice for wire-wrapping those stones onto a bracelet (or any piece that will get jostled around) — it’s pretty delicate.
11. Your Imagination
Look around: You may be able to hack something you already own. Need to make a circle? Look in your pantry. Use a baseball bat instead of a mandrel or a marker to mark your metal before you cut. Pretty soon you'll be noticing jewelry-making tools everywhere you look!
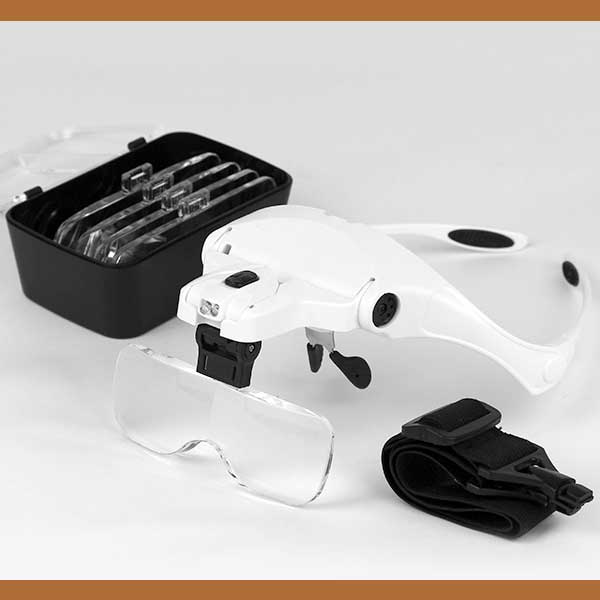
12. VisionAid™ Magnifier
Whether you bead at the kitchen table or have a totally decked-out jewelry design studio, one of the most important factors affecting the results of your jewelry-making sessions is your ability to comfortably see the design you're working on.
Face it, we are creatures of habit. Often times we continue using the same workplace set-up we've always had based on our set routines without pausing to realize that it could be much better. When was the last time you reviewed your visual comfort level? It could be time to make adjustments to lighting and to consider magnifying tools designed to enhance visual acuity and alleviate eyestrain.
The study of ergonomics (human-factors engineering) reports that for up-close work, the strongest lighting should be right on the spot where you are actually touching and looking closely at your object--this light level should be 10 times brighter than the light in the background of the room. To avoid eye fatigue, it helps if the strong lighting on the working area is diffused, such as from a daylight spectrum fluorescent lamp.
VisionAid™ Magnifier will help you see clearly and closely every detail and improve the quality of your work.